It is October and my instincts to cozy up, bake, can and create are pulsing. Last week, I had a crafty idea.
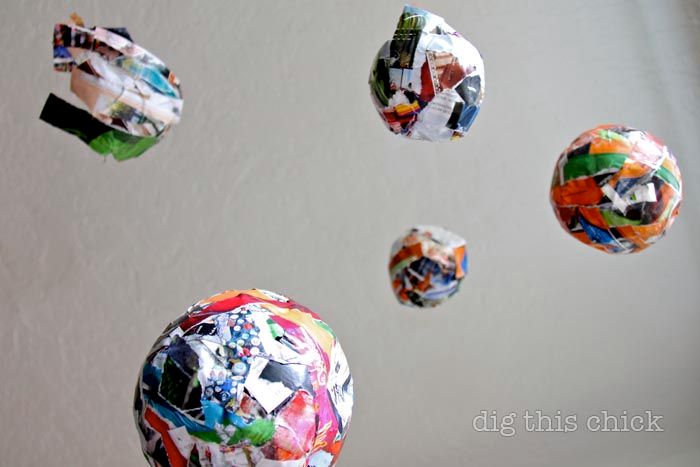
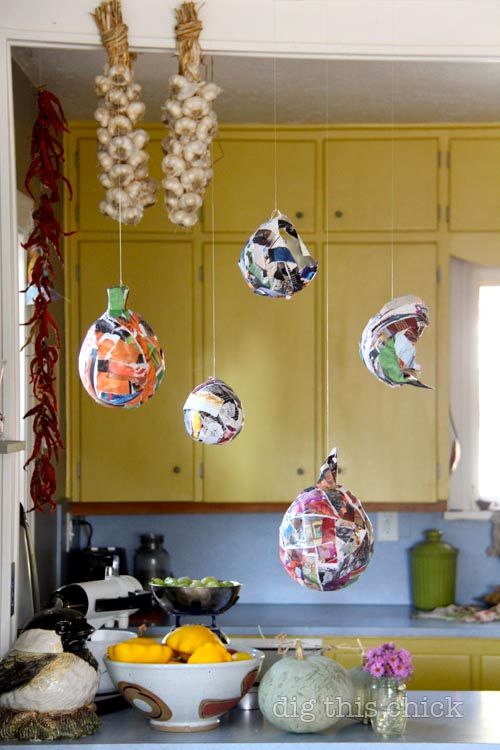
Behold our floating recycled pumpkins:
clear-drying white glue like mod podge or elmers
stabilizing vessel to hold balloons in place (we used a tuna can and a yogurt container)
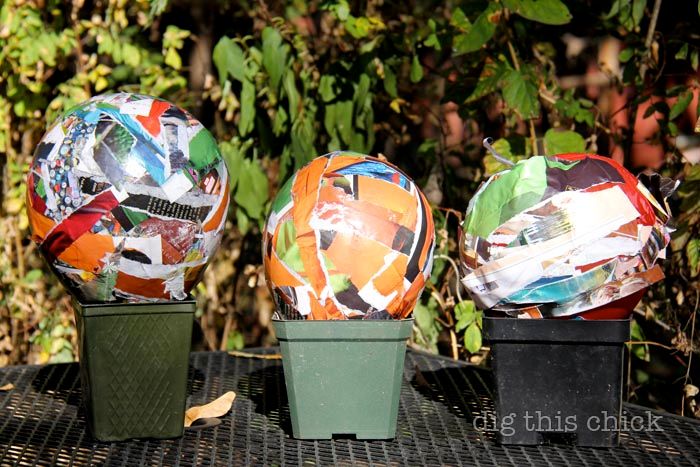
containers to hold balloons for drying (we used 4 inch plastic flower pots)
fishing line
nail or needle
tacks
To make:
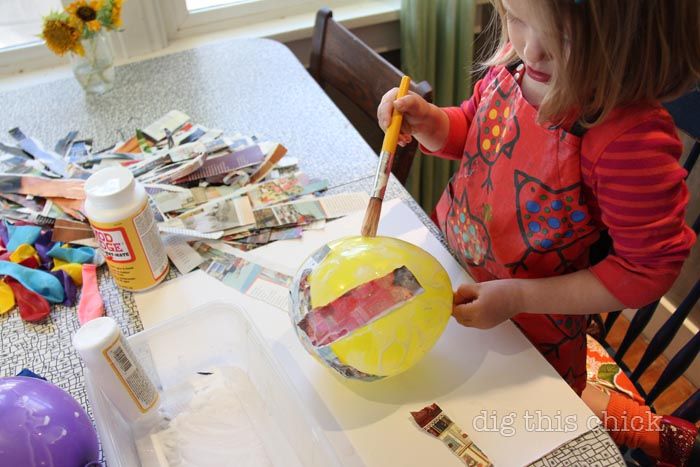
Blow up balloons to different sizes, rip up paper. Pour a few tablespoons of glue into a flat bottomed bowl and mixed with a few tablespoons of water. Place balloon in stabilizing vessel (they are slippery puppies!). Using paintbrushes and hands, coat the balloon and paper pieces with glue and stick to balloon. Cover as much or as little as you’d like.
Allow to dry in direct sun or a warm spot by propping upright in a container and moving every 10 minutes so it doesn’t stick to the container.
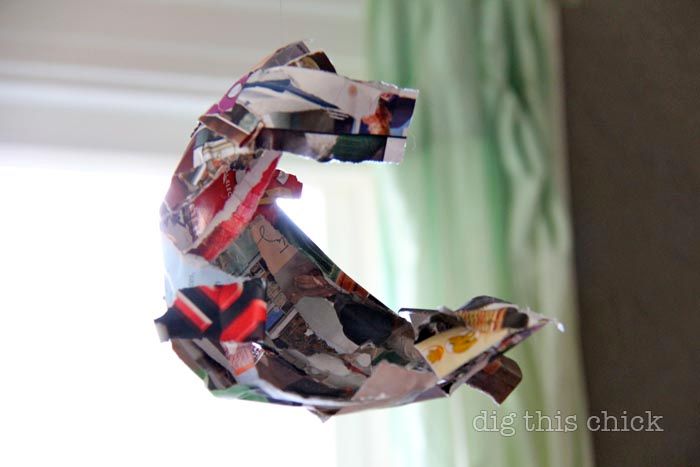
They will be dry to the touch really quickly but wait a bit to pop balloon because the glue against the balloon is still wet. I popped them (with a tack) after about 30 minutes and the deflating balloon pulled the pumpkin out of shape, sucked it all in on itself. I should have waited a few hours. Ruby loved the balloon popping. Is was crackling and squeaking and the pumpkin contorted like there was a mouse inside.
Margot and I started while Ruby napped and she turned to me, hands coated in glue and said, “Mama, I think this is just so fun. I like really like this.”
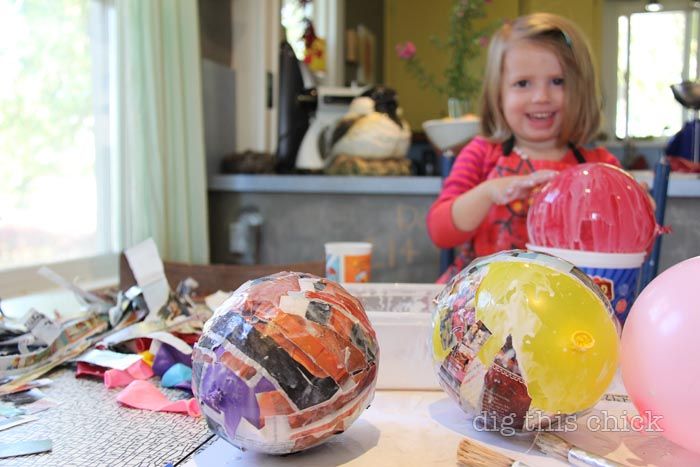
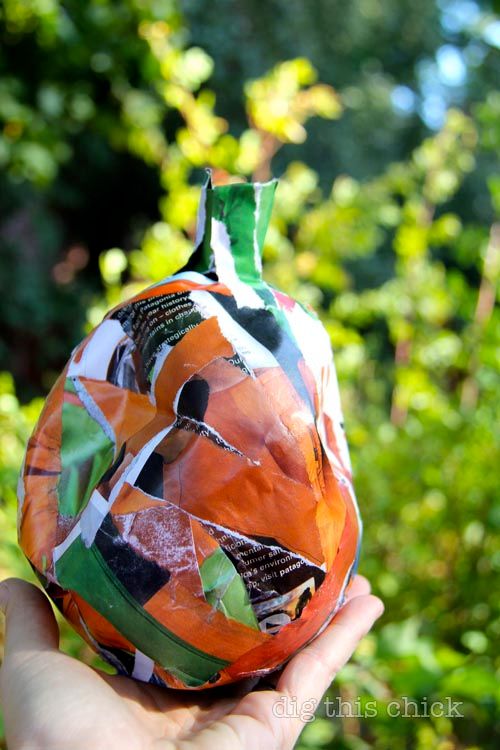
I chose to group colors for mine, wanting an orange pumpkin with a green stem. Margot and I made another together where she chose the paper and directed the placement and I did the glueing.
And, Margot made her own. “It’s a different kind of pumpkin, mama.” My little Ab Ex sculptor.
The next day when Margot napped, Ruby and I worked on a few smaller pieces. At her age, she doesn’t care as much about what paper she is using or what she is making. She just wants to participate, contribute, experiment and play. So she dipped paper and fingers in glue. She picked out the balloons we used, helped me smooth the strips and chose the tack colors for hanging.

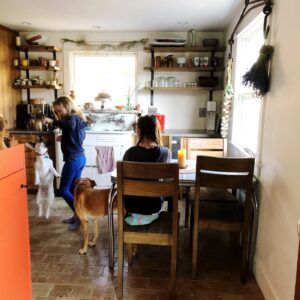
We hung our arrangement over the kitchen table. I find that any time I do anything in our home — put the kids to bed, can peaches, sweep the floor, change the cat litter, hang paper pumpkins — I think about moving away from this space, our home. In this week’s mama digs, I wrote about that wild process and what it feels like for me. Click to read heart home.
Next up, tomato sauce and costumes! Margot recently shifted from wanting to be a lion-duck to a sun-moon. Sister likes the hybrid costumes. What are you cooking up/crafting about/ making out there?
:: :: ::